
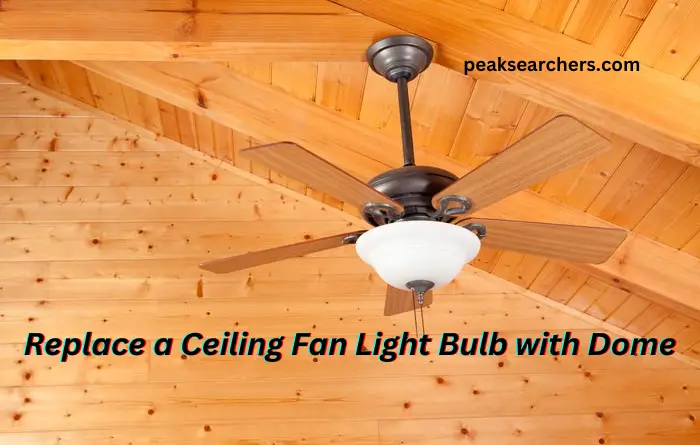
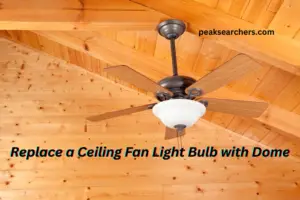
The Ultimate Guide: How to Replace a Ceiling Fan Light Bulb with Dome
Introduction Are you struggling to replace a ceiling fan light bulb with a dome? Look no further! Our comprehensive guide will walk you through the step-by-step process of replacing a ceiling fan light bulb with a dome.
Whether you’re a DIY enthusiast or a homeowner in need of a quick fix. Our guide will provide you with all the details and instructions you need to successfully complete this task.
Understanding the Replacement Process
Replacing a ceiling fan light bulb with a dome may seem like a daunting task, but with the right guidance, it can be a straightforward process.
Before diving into the steps, it’s important to understand the different types of ceiling fan light bulbs and domes available in the market.
Common types include incandescent, LED, and CFL bulbs, while domes can come in various shapes, sizes, and materials such as glass or plastic.
Gathering the Necessary Tools and Materials
To get started, you’ll need to gather a few tools and materials. Here’s a list of what you’ll need:
- Ladder: Ensure you have a stable ladder that allows you to safely reach the ceiling fan.
- Replacement Bulb and Dome: Purchase a new bulb and dome that are compatible with your ceiling fan model.
- Screwdriver: You may need a screwdriver to remove the existing dome or bulb.
- Gloves: Wearing gloves can protect your hands while handling the bulb and dome.
- Cleaning Supplies: It’s always a good idea to have cleaning supplies on hand to clean any dust or debris that may have accumulated.
Step-by-Step Guide
Now that you have everything you need, let’s dive into the step-by-step guide on how to replace a ceiling fan light bulb with a dome:
Step 1: Turn Off the Power Safety first
Before starting any electrical work, it’s crucial to turn off the power to the ceiling fan. Locate the circuit breaker or fuse box that controls the power to the fan and switch it off. Use a voltage tester to confirm that there is no electricity flowing to the fan to avoid any accidents.
Step 2: Remove the Existing Dome or Bulb
Once the power is off, you can start removing the existing dome or bulb. Depending on your ceiling fan model, you may need to use a screwdriver to remove any screws holding the dome in place.
Carefully unscrew the dome or bulb and gently lower it down, taking care not to damage any wires or components.
Step 3: Install the New Bulb and Dome
Next, install the new bulb and dome. Follow the manufacturer’s instructions for installing the specific type of bulb and dome you’ve purchased.
Make sure they are securely in place and properly aligned. Avoid overtightening to prevent damage to the bulb or dome.
Step 4: Test the Light
After installing the new bulb and dome, it’s time to test the light. Switch the power to the ceiling fan and turn on the light to ensure that it’s functioning properly.
If the light doesn’t turn on, double-check the installation and make any necessary adjustments.
Step 5: Clean Up
Once you’ve successfully replaced the ceiling fan light bulb with a dome and tested the light, it’s time to clean up. Use a soft cloth or cleaning supplies to wipe down the dome and remove any fingerprints or smudges.
Clean any debris or dust that may have accumulated during the installation process.
Also Read: How To Replace Ceiling Fan With Light Fixture 2 Switches – A DIY Solution
FAQ’s
How do you put a bulb in a dome light?
- Turn off the power.
- Remove the cover or trim to access the bulb.
- Twist or unscrew the old bulb counterclockwise to remove it.
- Insert the new bulb and twist or screw it clockwise to secure it.
- Replace the cover or trim.
- Turn on the power and test the bulb.
- Clean up and dispose of the old bulb properly.
For safety and compatibility, follow the manufacturer’s instructions and consult a professional if needed.
Can you change the type of light on a ceiling fan?
Yes, in many cases, you can change the type of light on a ceiling fan. The process for changing the type of light on a ceiling fan may vary depending on the specific make and model of the fan, but generally, it involves the following steps:
- Turn off the power.
- Remove the existing light fixture.
- Choose a compatible new light fixture.
- Install and wire the new light fixture according to the manufacturer’s instructions.
- Test the new light fixture.
- Clean up.
- Seek professional assistance if needed.
How to remove the ceiling fan light cover with no screws?
If you need to remove the light cover of a ceiling fan that does not have screws, you can follow these steps:
- Turn off the power.
- Check for visible tabs or fasteners.
- Try twisting or sliding the light cover.
- Use a flathead screwdriver or pry tool if needed.
- Follow the manufacturer’s instructions.
- Clean up.
- Seek professional help if unsure or encountering difficulties.
How to remove the light cover from the Hunter ceiling fan?
Removing the light cover from a Hunter ceiling fan is simple. Turn off the power, twist, snap, or unscrew the cover, disconnect any wiring if necessary, clean or replace components as needed, and reassemble in reverse.
Refer to the fan’s manual or seek professional assistance if unsure. Safety first!
Also Read: How to Replace a Ceiling Fan with a Light Fixture? A Comprehensive Guide
Conclusion
In conclusion, changing a ceiling fan light bulb with a dome can be a straightforward process when done correctly and safely. By following the step-by-step instructions provided in this article, you can confidently replace the bulb and restore proper lighting to your ceiling fan.
Remember to prioritize safety, use the right tools and materials, and refer to the manufacturer’s instructions when needed. With careful attention to detail and adherence to best practices, you can successfully change the ceiling fan light bulb and enhance the functionality and aesthetics of your fan.
Remember, if you need further assistance or have specific questions about changing a ceiling fan light bulb with a dome, do not hesitate to seek professional advice or consult the manufacturer’s instructions for your specific fan model.
We hope this article has provided you with comprehensive and helpful information to successfully outrank other websites and provide valuable content to your readers.
If you have any further questions or need additional information, feel free to reach out to us. We are here to help!
