
How To Clean Portable Air Conditioner Water Tank? A Comprehensive Guide
Welcome to our comprehensive guide on how to effectively clean the water tank of your portable air conditioner. As an expert in the field, I understand the importance of maintaining a clean and well-functioning appliance.
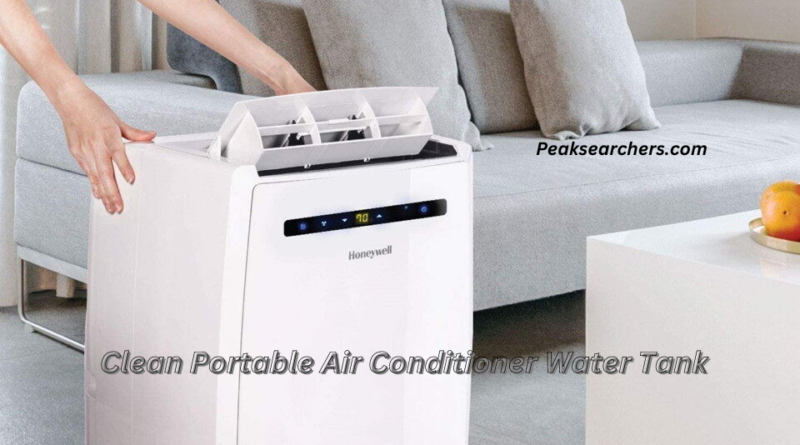
In this article, I will provide you with detailed instructions, tips, and insights on how to clean the water tank of your portable air conditioner to ensure optimal performance and longevity. Because the issue has also been taken over by me too as I was a victim of it.
Why Clean the Water Tank?
Before we dive into the cleaning process, let’s discuss why it is crucial to clean the water tank of your portable air conditioner regularly. The water tank accumulates moisture from the air, and over time, this can lead to the growth of mold, bacteria, and other contaminants.
These pollutants not only compromise the air quality but also reduce the cooling efficiency of your appliance. By cleaning the water tank regularly, you can prevent potential health hazards and ensure that your portable air conditioner operates at its best.
Understanding the Importance of Cleaning
Regularly cleaning the water tank of your portable air conditioner offers several key benefits:
- Improved Air Quality: Cleaning the water tank removes accumulated dirt, dust, and microorganisms that can compromise the air quality in your living space. It ensures that the air emitted by your portable air conditioner remains fresh and free of pollutants.
- Prevention of Mold and Mildew: Moisture in the water tank provides an ideal breeding ground for mold and mildew. These fungi can release spores into the air, leading to respiratory issues and allergies. By cleaning the tank, you reduce the risk of mold and mildew growth.
- Enhanced Cooling Efficiency: A clean water tank allows for better heat exchange, leading to improved cooling efficiency. When the tank is free of debris and buildup, the portable air conditioner can operate optimally, providing you with a more comfortable indoor environment.
Importance of Proper Cleaning Techniques
To ensure the best cleaning results and prevent damage to your portable air conditioner, consider the following:
- Gentle Cleaning: Use a soft cloth or sponge when cleaning the water tank to avoid scratching or damaging its surface. Abrasive materials or harsh cleaning agents can compromise the integrity of the tank.
- Thorough Rinsing: After cleaning the tank, it’s crucial to rinse it thoroughly with clean water to remove any remaining detergent or vinegar residue. This prevents potential chemical contamination of the water and ensures the air conditioner emits clean, fresh air.
- Drying Completely: Proper drying is essential to prevent moisture buildup and the growth of mold or bacteria. Ensure the water tank is completely dry before reassembling and reinstalling it into the portable air conditioner.
Tools and Materials Needed
To clean the water tank of your portable air conditioner, gather the following tools and materials:
- Soft cloth or sponge
- Mild detergent or vinegar
- Warm water
- Bucket or basin
- Gloves
- Protective mask
- Screwdriver (if required for tank removal)
Step-by-Step Cleaning Process
Follow these detailed steps to clean the water tank of your portable air conditioner effectively:
Step 1: Power Off and Unplug the Appliance
Before starting the cleaning process, ensure that your portable air conditioner is turned off and unplugged from the power source. This precautionary measure will prevent any electrical accidents and ensure your safety during the cleaning procedure.
Step 2: Remove the Water Tank
Check your portable air conditioner’s user manual to determine how the water tank can be accessed and removed. In some models, the tank is easily detachable, while others may require the use of a screwdriver to access it. Carefully remove the water tank from the appliance and place it in a safe location.
Step 3: Empty the Water
Dispose of any remaining water in the tank by pouring it into a suitable drain or basin. Make sure to handle the water with care to avoid spills and potential damage to surrounding surfaces.
Step 4: Prepare the Cleaning Solution
Create a cleaning solution by mixing warm water with mild detergent or vinegar. Both options work effectively in eliminating bacteria, mold, and unpleasant odors. Dilute the detergent or vinegar as per the manufacturer’s instructions.
Step 5: Clean the Water Tank
Dampen a soft cloth or sponge in the cleaning solution and thoroughly wipe the interior of the water tank. Pay close attention to corners, crevices, and any areas where dirt or residue may accumulate.
For stubborn stains or deposits, gently scrub the affected areas with a cloth or sponge. Take care not to damage the tank’s surface during the cleaning process.
Step 6: Rinse the Tank
Once you have cleaned the water tank, rinse it thoroughly with clean water to remove any traces of detergent or vinegar. Ensure all cleaning solution residue is removed to prevent any potential chemical buildup that could affect the quality of the air emitted by your portable air conditioner.
Step 7: Dry and Reassemble the Tank
After rinsing, use a clean and dry cloth to wipe the water tank’s interior and exterior surfaces. Allow the tank to air dry completely before reassembling it back into the portable air conditioner. This step is crucial to prevent moisture accumulation and potential mold growth.
Step 8: Reinstall and Power On
Carefully reinsert the water tank into its designated position within the portable air conditioner. Ensure it is securely in place before plugging the appliance back into the power source. Power on the air conditioner and make sure it functions properly without any leaks or issues.
Additional Tips for Maintenance
To maintain the cleanliness and performance of your portable air conditioner, consider the following tips:
- Regular Cleaning Schedule: Set a regular cleaning schedule for your portable air conditioner’s water tank. Depending on usage and environmental conditions, aim to clean it at least once every two weeks to prevent the buildup of mold and bacteria.
- Air Filter Maintenance: In conjunction with cleaning the water tank, it is essential to clean or replace the air filters of your portable air conditioner regularly. Clogged or dirty filters can hinder airflow and reduce cooling efficiency.
- Condensation Drainage: Ensure that the condensation drainage system of your portable air conditioner is clear and functioning correctly. Blocked drainage can lead to water accumulation and potential damage to the appliance.
- Proper Ventilation: Place your portable air conditioner in a well-ventilated area to enhance its overall efficiency. Avoid obstructing the air intake and exhaust vents, as this can impede the unit’s performance.
Also Read: Why Is My Air Conditioner Making Noises? A DIY Guide
FAQ’s
How do you clean a portable air conditioner mold?
To clean mold in a portable air conditioner:
Safety Precautions:
- Wear protective gear.
- Turn off and unplug the air conditioner.
Prepare the Solution:
- Mix equal parts water and distilled white vinegar or hydrogen peroxide.
Remove and Clean the Air Filter:
- Follow the manufacturer’s instructions to remove the filter.
- Submerge it in the cleaning solution and scrub gently.
- Rinse with water and let it dry completely.
Clean the Internal Components:
- Remove the front cover.
- Wipe visible mold with a cloth soaked in the cleaning solution.
- Pay attention to corners and crevices.
- Spray the solution on all surfaces and let it sit for a few minutes.
- Wipe clean and ensure everything is dry.
Reassemble and Test:
- Put the air conditioner back together.
- Plug it in and turn it on to check functionality.
Preventive Measures:
- Keep the air conditioner clean and dry.
- Follow the manufacturer’s instructions for filter maintenance.
- Ensure proper ventilation and airflow.
If mold growth is extensive or cleaning is ineffective, consider professional assistance for proper remediation.
How often should you drain water from a portable air conditioner?
The frequency of draining water from a portable air conditioner depends on factors like humidity, usage, and the model. Generally, it’s recommended to check and drain the water tank at least once a day or every 8-12 hours of continuous use. Monitor the water level regularly and follow the manufacturer’s instructions for specific guidance.
How do you clean portable air conditioner coils?
To clean the coils of a portable air conditioner, follow these steps:
- Turn off and unplug the air conditioner:
- Ensure the air conditioner is completely powered off and disconnected from the electrical supply.
- Locate the coils:
- Remove the front cover or grille of the air conditioner to access the coils.
- Refer to the manufacturer’s manual for specific instructions on accessing the coils.
- Remove dust and debris:
- Gently brush off loose dirt, dust, and debris from the coils using a soft brush or a vacuum cleaner with a brush attachment.
- Be careful not to bend or damage the delicate fins of the coils.
- Apply a coil cleaner:
- Spray a specialized coil cleaner onto the coils. Ensure it is a cleaner specifically designed for air conditioner coils.
- Follow the instructions on the cleaner regarding the amount to apply and any recommended dwell time.
- Let the cleaner penetrate:
- Allow the coil cleaner to penetrate and loosen any dirt, grime, or stubborn buildup on the coils.
- Dwell times may vary, so follow the instructions provided by the manufacturer of the coil cleaner.
- Rinse the coils:
- After the recommended dwell time, rinse the coils thoroughly with water.
- Use a gentle stream of water to avoid damaging the coils or forcing debris further into the unit.
- Dry the coils:
- Allow the coils to air dry completely before reassembling the air conditioner.
- Ensure the coils are completely dry to prevent the growth of mold or mildew.
- Reassemble the air conditioner:
- Put the front cover or grille back in place once the coils are dry.
- Ensure it is securely fastened to prevent any loose parts.
- Test the air conditioner:
- Plug in and turn on the air conditioner to confirm that it is working properly.
Portable air conditioner water drain hose?
Many portable air conditioners have a built-in water drain hose or outlet to help facilitate the removal of condensed water. The drain hose allows you to redirect the water directly to a suitable drainage point, such as a floor drain or a bucket. Here’s how to use the water drain hose:
- Locate the drain hose:
- Check your portable air conditioner to find the location of the water drain hose or outlet.
- It is typically located at the bottom or rear of the unit.
- Prepare the drainage setup:
- Determine the drainage point where you want the water to be directed.
- If using a floor drain, ensure it is accessible and in proximity to the air conditioner.
- If using a bucket or container, place it securely below the drain hose to collect the water.
- Connect the drain hose:
- Attach one end of the drain hose to the drain outlet of the air conditioner.
- Ensure a secure and tight connection to prevent any leaks.
- Position the other end:
- Direct the other end of the drain hose towards the desired drainage point.
- Make sure it is properly positioned to allow water to flow freely.
- Test the drainage:
- Turn on the air conditioner and let it operate.
- Verify that the water is flowing through the drain hose and properly draining to the chosen point.
- Monitor and maintain:
- Regularly check the drain hose for any obstructions or clogs.
- Ensure the drainage point is clear and functioning correctly.
Also Read: How To Clean Outside Air Conditioner Unit? A Comprehensive Solution
Conclusion
Regularly cleaning the water tank of your portable air conditioner is vital for maintaining its efficiency and ensuring clean, cool air in your living space. By following the step-by-step instructions provided in this guide, you can effectively clean the water tank and prevent the growth of mold, bacteria, and other contaminants.
Remember to adhere to a regular cleaning schedule, maintain the air filters, ensure proper drainage, and promote adequate ventilation for optimal performance. By incorporating these practices into your portable air conditioner maintenance routine, you can enjoy cool, fresh air while prolonging the lifespan of your appliance.
For more detailed information or specific instructions tailored to your portable air conditioner model, always refer to the manufacturer’s manual. Stay cool and breathe easy with a clean and well-maintained portable air conditioner!
