

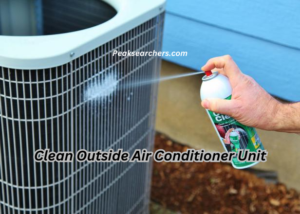
How To Clean Outside Air Conditioner Unit? A Comprehensive Solution
Welcome to our comprehensive guide on how to clean your outside air conditioner unit. Proper maintenance of your air conditioner is essential to ensure optimal performance, energy efficiency, and longevity. I did not know that cleaning the outdoor unit of an AC can result so beneficial for me.
As soon as I cleaned my outside unit, the breeze changed immediately and the cooling was unbearable.
In this article, we will provide you with step-by-step instructions on how to clean your outside air conditioner unit effectively. By following these guidelines, you can maintain a clean and well-functioning air conditioner, which can contribute to a more comfortable indoor environment and potentially lower energy costs.
Tools and Materials Needed
Before we delve into the cleaning process, it is important to gather the necessary tools and materials. Here’s a list of what you will need:
- Garden hose with a spray nozzle
- Soft-bristle brush
- Screwdriver
- Fin comb (optional)
- A vacuum cleaner with a brush attachment
- Safety gloves
- Safety goggles
Safety First
Before you begin cleaning your outside air conditioner unit, it’s essential to prioritize safety. Make sure to turn off the power supply to the unit. Locate the electrical disconnect switch near the unit and turn it off to avoid any electrical hazards during the cleaning process.
Clear Debris
The first step in cleaning your outside air conditioner unit is to remove any debris or obstructions that may have accumulated around it. This includes leaves, twigs, grass clippings, and other debris that can restrict airflow and hinder the unit’s performance. Use a rake, broom, or a gentle brush to clear the area surrounding the unit.
Shut Off the Water Supply
If your air conditioner unit has a condenser coil, it may be connected to a water source. Before cleaning, make sure to shut off the water supply to prevent any water damage or interference during the cleaning process.
Remove the Fan Cage
Once the area is clear, carefully remove the fan cage or the protective grill that covers the condenser unit. This can usually be done by unscrewing a few bolts or screws. Set the screws aside in a safe place to ensure you don’t lose them.
Clean the Fan Blades
With the fan cage removed, you will have access to the fan blades. Gently clean the blades using a soft brush or a damp cloth to remove any dirt, dust, or debris that may have accumulated over time. Ensure you clean both sides of the blades thoroughly.
Clean the Fins
The fins, located behind the fan blades, play a vital role in heat transfer. Over time, they can become clogged with dirt and debris, obstructing airflow. To clean the fins, use a fin brush or a soft brush attachment on your vacuum cleaner. Gently run the brush along the fins, being careful not to bend or damage them.
Clear Debris from Fins
After brushing the fins, it’s important to clear any loosened debris. You can use a garden hose with a gentle spray setting to rinse the fins from the inside out. Be cautious not to use excessive water pressure, as it can damage the fins or push the debris further into the unit. Direct the water at a slight angle to avoid bending the fins.
Straighten Bent Fins
If you notice any bent or misaligned fins during the cleaning process, you can use a fin comb, readily available at most home improvement stores, to straighten them. Gently comb through the fins to restore their original shape and ensure unrestricted airflow.
Clean the Surrounding Area
While the unit is open, take the opportunity to clean the area surrounding the air conditioner. Remove any dirt, leaves, or debris that may have accumulated on the ground or nearby surfaces. A clean and clear area promotes proper airflow and prevents potential obstructions.
Reassemble the Unit
Once you have completed the cleaning process, carefully reassemble the unit by replacing the fan cage or protective grill. Secure it with the screws or bolts that you had set aside earlier. Ensure all the components are properly aligned and fastened.
Restore Power and Test
After reassembling the unit, it’s time to restore power. Go to the electrical disconnect switch and turn it on to reactivate the power supply to your outside air conditioner unit. Once the power is restored, you can test the unit to ensure it’s functioning correctly.
Monitor Performance
Observe the performance of your air conditioner unit in the following hours and days. Check for any unusual noises, leaks, or a decline in cooling efficiency. If you notice any issues, it’s recommended to contact a professional HVAC technician to assess and address the problem promptly.
Schedule Regular Maintenance
Cleaning your outside air conditioner unit is an essential maintenance task, but it’s also crucial to schedule regular professional maintenance. HVAC experts can inspect and service your unit, ensuring optimal performance and identifying any potential issues before they become major problems. Regular maintenance can significantly extend the lifespan of your air conditioner unit and save you from costly repairs.
Additional Tips for Maintenance
In addition to regular cleaning and professional maintenance, here are a few extra tips to keep your outside air conditioner unit in top condition:
- Trim foliage: Maintain at least a two-foot clearance around your air conditioner unit to prevent leaves, branches, or plants from obstructing airflow.
- Change air filters: Regularly change or clean the air filters in your air conditioner unit to promote better air quality and prevent clogs.
- Protect from harsh weather: If your area experiences severe weather conditions, such as storms or hail, consider using a protective cover or shelter for your air conditioner unit to prevent damage.
- Avoid chemical cleaners: Stick to mild soapy water or specialized coil cleaners when cleaning your unit. Harsh chemicals can damage delicate components.
- Keep pets away: While it may seem tempting for pets to seek shade near the air conditioner unit, ensure they are kept at a safe distance. Pet urine can cause corrosion and damage to the unit.
Also Read: Why Is My Air Conditioner Making Noises? A DIY Guide
FAQ’s
Is it OK to spray water on your air conditioner?
Yes, it is generally safe to spray water on your air conditioner. In fact, spraying water is an important step in cleaning the unit and removing dirt, debris, and dust that may have accumulated on the exterior.
However, it is crucial to keep a few important points in mind:
- Power Off: Before spraying water on your air conditioner, make sure to turn off the power supply. This is to ensure your safety and prevent any electrical accidents.
- Gentle Water Pressure: Use a garden hose with a spray nozzle to create a gentle stream of water. Avoid using high-pressure jets or power washers, as they can potentially damage the delicate fins and other components of the unit.
- Fin Protection: While spraying water, be careful not to bend or damage the fins. The fins are thin, delicate metal pieces that are responsible for heat transfer. If they become bent or damaged, it can affect the efficiency of the unit. To prevent this, maintain a reasonable distance from the unit and avoid spraying water directly at a sharp angle onto the fins.
- Proper Drainage: Ensure that the water used during cleaning does not enter the electrical components of the air conditioner. Be mindful of the unit’s drainage holes or channels and ensure they are clear of obstructions to allow proper water flow and drainage.
How do I clean the outside of my AC coil?
Here’s a step-by-step guide on how to clean the outside of your AC coil:
- Turn Off the Power: Before starting any cleaning procedure, it is crucial to turn off the power supply to your air conditioner. Locate the electrical disconnect box near the unit and switch it off to prevent any accidents.
- Remove Debris: Begin by removing any debris such as leaves, twigs, or grass clippings that may have accumulated on and around the AC coil. You can use a soft-bristle brush, a gloved hand, or a vacuum cleaner with a brush attachment to gently remove the debris.
- Inspect the Coil: After clearing away the debris, inspect the AC coil for any visible dirt, dust, or grime. Depending on the severity of the buildup, you may need to use a cleaning solution.
- Prepare a Cleaning Solution: In a spray bottle, mix a solution of equal parts water and mild detergent or a commercially available coil cleaner. Avoid using strong chemicals or acids, as they can damage the coil.
- Rinse with Water: After the cleaning solution has had time to work, use a gentle stream of water from a garden hose to rinse off the coil. This helps to flush away the loosened dirt and cleaning solution.
- Repeat if Necessary: For stubborn or heavily soiled coils, you may need to repeat the cleaning process. Apply the cleaning solution again, let it sit, and rinse with water until the coil is clean.
- Allow to Dry: After rinsing, allow the coil to air dry completely before restoring power to the air conditioner. This helps prevent any potential electrical issues.
How often should you clean your outside AC unit?
The frequency to clean your outside Air Conditioner unit depends on various factors, including the surrounding environment and usage intensity. Here are some general guidelines:
- Seasonal Cleaning: It is recommended to clean your outside AC unit at the beginning of each cooling season. This ensures that the unit starts the season with optimal efficiency and performance.
- Regular Inspection: Along with the seasonal cleaning, it is a good practice to inspect the unit periodically throughout the cooling season. Check for any visible dirt, debris, or signs of obstruction that may affect the unit’s performance.
- Environmental Factors: If your AC unit is located in an area with heavy foliage, construction nearby, or in a dusty environment, more frequent cleaning may be necessary. These factors can lead to a quicker buildup of debris on the unit, hindering its efficiency.
- Usage Intensity: If your air conditioner operates for extended periods or experiences heavy usage, more frequent cleaning may be beneficial. This is especially true in areas with high humidity or where the unit is subjected to intense heat.
How to clean the outside ac unit with a water hose?
Here’s a step-by-step guide on how to Clean Outside Air Conditioner Unit water hose:
- Prepare for Safety: Before you begin, ensure your safety by turning off the power supply to the AC unit. Locate the electrical disconnect box near the unit and switch it off to prevent any accidents.
- Remove Debris: Clear away any debris, such as leaves, twigs, or grass clippings, from the AC unit using a soft-bristle brush or a gloved hand. Take care not to damage the delicate fins while doing so.
- Attach a Nozzle: Attach a spray nozzle to your garden hose that provides a gentle and even flow of water. Avoid using high-pressure jets or power washers.
- Pay Attention to Fins: Take extra care when cleaning the fins, as they are delicate. Hold the hose at a slight angle to avoid bending or damaging the fins. Direct the water stream between the fins, allowing it to remove any trapped dirt or debris.
- Clean the Surrounding Area: While cleaning the AC unit, pay attention to the surrounding area as well. Remove any dirt, leaves, or other debris that may obstruct airflow or affect the unit’s performance.
- Inspect for Remaining Debris: After rinsing, visually inspect the unit for any remaining dirt or debris. If you notice any stubborn spots, you can gently brush them with a soft-bristle brush or use a mild detergent mixed with water to aid in the cleaning process.
- Allow to Dry: Once the cleaning is complete, allow the AC unit to air dry completely before restoring power. This helps to prevent any potential electrical issues.
How to clean the air conditioner wall unit?
- Turn Off the Power: Before you begin cleaning, make sure to turn off the power to the unit.
- Remove the Front Cover: Depending on the model of your wall unit, you may need to remove the front cover to access the internal components for cleaning.
- Clean the Air Filters: The air filters in your wall unit play a crucial role in filtering dust and other particles from the air. Remove the filters from the unit and clean them.
- Clean the Front Cover and Exterior: While the filters are drying, take the opportunity to clean the front cover and the exterior of the unit. Use a soft cloth or sponge dampened with a mild detergent solution to wipe away any dust, grime, or stains.
- Clear the Drainage Hole: Locate the drainage hole or channel at the back of the unit. Use a small brush or pipe cleaner to clear any debris or blockages from the hole. This ensures proper drainage of condensation from the unit.
- Reinstall the Air Filters: Once the filters are dry, reinsert them back into the unit. Make sure they are securely in place and properly aligned.
- Reattach the Front Cover: Carefully reinstall the front cover according to the manufacturer’s instructions. Ensure that it is properly secured and aligned with the unit.
- Power On and Test: Once you have completed the cleaning process and reassembled the unit, you can turn on the power and test the air conditioner to ensure it is functioning properly.
Also Read: Why Does My Air Conditioner Keep Freezing Up? A DIY Guide
Conclusion
Regularly cleaning and maintaining your outside air conditioner unit is a crucial step in ensuring its efficient operation and longevity.
By following the step-by-step process outlined in this guide, you can effectively clean your unit and keep it in optimal condition. Remember to prioritize safety, monitor performance, and schedule regular professional maintenance to enjoy the benefits of a well-maintained air conditioner unit.
Remember, a clean outside air conditioner unit not only provides you with cool and comfortable air but also helps you save on energy costs and prevents potential breakdowns. Take the time to care for your unit, and it will reward you with reliable performance for years to come.
