How to Remove Flashlight from iPhone Lock Screen? A DIY Guide
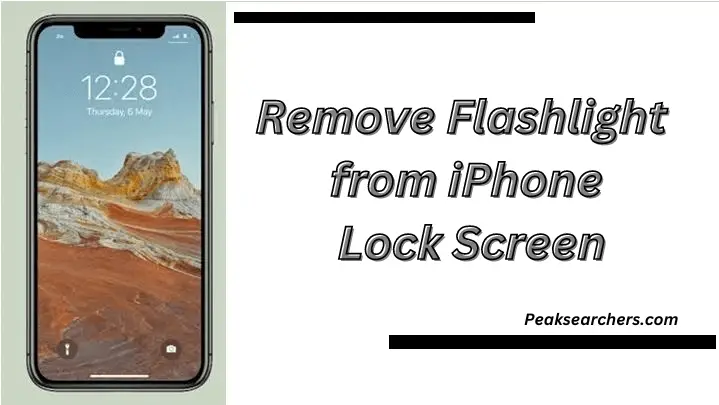
At Peaksearchers, we understand the frustration that can arise when certain features on your iPhone don’t align with your preferences. One such feature is the flashlight icon on the lock screen, which can be a nuisance for some users. In this comprehensive guide, we will walk you through the steps to remove the flashlight from your iPhone lock screen, allowing you to streamline your device’s functionality effortlessly.

Disabling Flashlight on iPhone Lock Screen
To remove the flashlight icon from your iPhone lock screen, follow these straightforward steps:
Step 1: Accessing the Settings
Begin by unlocking your iPhone and locating the “Settings” app. The app icon resembles a gear and can usually be found on your home screen.
Step 2: Navigating to Control Center Settings
In the “Settings” menu, scroll down and tap on “Control Center.” This section governs the features that appear in the Control Center, which is accessible by swiping down from the top-right corner of your iPhone screen.
Step 3: Customize Controls
Within the “Control Center” settings, locate and select “Customize Controls.” This option allows you to add or remove various features from the Control Center.
Step 4: Removing Flashlight from Control Center
In the “Customize Controls” section, you will find two lists. The top list showcases the features currently present in the Control Center, while the bottom list displays available features that can be added. Scroll down until you find “Flashlight” in the top list.
Step 5: Tap to Remove
Tap the red minus icon (–) next to “Flashlight.” This action will remove the flashlight icon from your Control Center and consequently from the lock screen.
Step 6: Confirm the Changes
Finally, exit the “Settings” app and lock your iPhone. Swipe down from the top-right corner to open the Control Center on the lock screen. You will notice that the flashlight icon is no longer visible.
Congratulations! You have successfully removed the flashlight from your iPhone lock screen, streamlining your device’s display and enhancing your user experience.
It’s important to note that while this method eliminates the flashlight icon from the lock screen, you can still access the flashlight feature through the Control Center when your iPhone is unlocked. This ensures that you retain easy access to the flashlight without unnecessary clutter on the lock screen.
Common Concerns and Troubleshooting
The flashlight Icon is Still Visible
If you have followed the steps above and find that the flashlight icon remains on your lock screen, ensure that you have correctly tapped the red minus icon to remove it from the Control Center settings. If the issue persists, try restarting your iPhone and repeat the steps.
iOS Updates and Changes
Please be aware that with iOS updates, Apple may introduce changes to the interface and settings. While the process described above applies to most iOS versions, it’s always beneficial to check for any specific adjustments in newer updates.
Benefits of Streamlining Your Lock Screen
By customizing your Control Center and removing unnecessary features, you not only declutter your lock screen but also optimize your iPhone’s performance. A cleaner interface allows for smoother navigation and quicker access to essential functions, making your overall user experience more enjoyable.
Customize Your Control Center
Apart from removing the flashlight icon, the Control Center can be further customized to include the features you use the most. To do this:
Step 1: Accessing Control Center Customization
Follow the same steps mentioned earlier to reach the “Customize Controls” section under “Control Center” in the “Settings” app.
Step 2: Add Frequently Used Features
In the “Customize Controls” section, the bottom list displays available features that can be added to the Control Center. Simply tap the green plus icon (+) next to the feature you want to include.
Step 3: Reorder Control Center Icons
You can also rearrange the icons to suit your preferences. To do this, press and hold the three horizontal lines next to a feature and drag it to the desired position in the top list.
Utilize AssistiveTouch for Convenience
AssistiveTouch is a helpful feature designed to make navigation easier, particularly for users with physical challenges or those who prefer alternative control methods. To enable AssistiveTouch:
Step 1: Access Accessibility Settings
Go to the “Settings” app, tap on “Accessibility,” and then select “Touch.”
Step 2: Enable AssistiveTouch
Within the “Touch” section, toggle on “AssistiveTouch.”
Step 3: Customize AssistiveTouch Menu
You can further customize the AssistiveTouch menu by tapping “Customize Top Level Menu.” This enables you to add shortcuts to your most-used functions for quick access.
Improve Battery Life with Low Power Mode
If you find that your iPhone’s battery life is draining faster than desired, activating Low Power Mode can significantly extend it. To enable Low Power Mode:
Method 1: Through the Control Center
Swipe down from the top-right corner of your iPhone to access the Control Center. Tap the battery icon, and a slider will appear to activate Low Power Mode.
Method 2: Through Settings
Alternatively, go to the “Settings” app, tap on “Battery,” and then toggle on “Low Power Mode.”
Mastering Do Not Disturb
Do Not Disturb is a useful feature that allows you to silence notifications and calls when you need uninterrupted focus or rest. To access Do Not Disturb settings:
Step 1: Locate Do Not Disturb
Swipe down from the top-right corner to access the Control Center, then tap the crescent moon icon to enable Do Not Disturb.
Step 2: Customize Do Not Disturb Settings
For more options and customization, head to the “Settings” app, and tap on “Do Not Disturb.” Here, you can schedule Do Not Disturb, enable it during driving, or allow calls from specific contacts.
Stay Organized with Folders
Keep your home screen neat and organized by creating folders for similar apps. This can be particularly helpful if you have numerous apps installed. To create folders:
Step 1: Long-Press an App
Press and hold any app on your home screen until all the apps start to wiggle.
Step 2: Drag One App Onto Another
Drag one app on top of another app you want to group together. This action will create a folder automatically.
Step 3: Customize Folder Name
Tap the folder to open it, then tap the name field to customize the folder’s name according to its contents.
Utilize Siri’s Voice Commands
Siri is a powerful virtual assistant that can execute tasks through voice commands. To activate Siri:
Method 1: Hey Siri
Say “Hey Siri” followed by your command. Ensure you’ve enabled this feature by going to “Settings” > “Siri & Search” > “Listen for ‘Hey Siri’.”
Method 2: Side Button or Home Button
Hold down the side button (on iPhone X or later) or the home button (on earlier iPhone models) to activate Siri.
Also Read: How To Connect Bluetooth Speakers To PS5? A Comprehensive Guide
Conclusion
At Peaksearchers, we strive to provide you with valuable solutions to enhance your device usage. By following the step-by-step guide above, you can effortlessly remove the flashlight icon from your iPhone lock screen, creating a more streamlined and personalized experience. Remember, customizing your device to suit your preferences is one of the many ways to optimize your iPhone’s functionality and make the most out of your investment.


