
How To Reset Your Daikin Air Conditioner In Ten Easy Steps
In order to maintain the best performance and longest life out of your Daikin air conditioner, it’s critical that you perform periodic maintenance on it regularly. Maintenance includes vacuuming out the dust from inside your unit and removing any buildup from the coils at the back of your unit (clean these every three months). We will Discuss How we reset Daikin Air Conditioner In Ten Easy Steps.
When I wanted to reset my Daikin AC, I faced many problems because I had no idea whatsoever regarding the reset. I got help from experts in the field so they guided me on how to get out of this issue.. They guided me so I was finally able to do it.
To completely reset your Daikin air conditioner and make sure that everything is working as it should, you’ll need to run the power test cycle which can be done in ten simple steps. Once you have reset your Daikin air conditioner, everything will be running smoothly again!
Step 1: Unplug the Air Conditioner
The first step is to locate the AC unit and unplug it from its power source. At this point, if you have any doubts about what you are doing, you should contact a professional who is qualified to fix your issue.
It is important that you do not force any of the buttons on the control panel or turn the machine back on during this step as doing so can result in damaging or permanently disabling your AC.
Once you have unplugged the unit from its power source, proceed to Step 2 below. Next, inspect all of the access panels and doors to look for screws or anything else out of place.
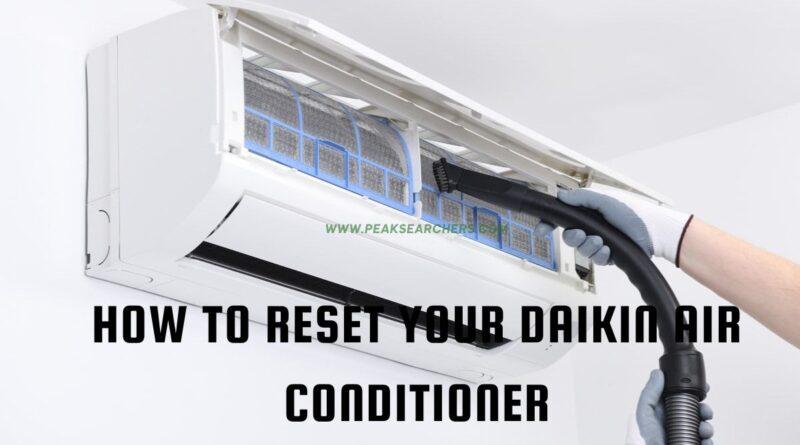
You will want to remove anything that may be restricting airflow into or out of your system including dirt or leaves stuck within vents. If there are filters within reach they should also be removed at this time.
This cleaning process may require the use of household tools such as a screwdriver depending on how old your AC unit is; however, before working with these tools always ensure that they won’t cause further damage once inside your system.
Step 2: Remove the Drainage Water Tank
Carefully pull the water tank on the back of the unit and place it on a flat surface. With the water tank removed, you will notice an opening at the bottom of the AC unit. Put your hand into this opening and push until you find a button that says reset.
Press it once to turn off cycling mode and start cooling properly again. If pressing this button doesn’t help, call an HVAC technician or take the AC unit back to where you bought it for repair.
Step 3: Reset The Unit
Pull the power cord out of the wall, and then press the start button. Your air conditioner should turn off. Once it has, let go of the start button.
Plug in the power cord and wait for two minutes. Your air conditioner should power back on. Check the display panel to see if there are any error codes; if not, you’re good to go! If there is an error code displayed, consult a qualified HVAC technician.
Step 4: Reconnect Everything
Be sure all wires are connected. Reinsert and push the plug, until you hear it click into place. Do the same with the cord from the remote sensor, making sure it snaps into place on the back of the sensor. If these two plugs don’t snap in, that means they weren’t inserted properly.
Reconnect them until they snap into place and do not remove them until the complete operation has been achieved as mentioned before.
Step 5: Turn On The Device
Step 6: Perform A Test Run Section
First, set the desired temperature and run the test run. This will allow you to ensure that the desired temperature is set at a comfortable level. If it is not, adjust it accordingly by pressing one of the arrows on either side of the screen.
Next Second, if you are going for an energy-efficient setting then increase or decrease humidity levels as needed. Next Thirdly, turn off ice mode so that this does not keep refreshing and using up energy unnecessarily. Fourthly, press down once on Energy Efficiency Mode.
Fifth, set auto restart duration time-this should be set between 0-4 hours for energy efficiency purposes. Sixth, turn off the timer function since this will waste energy by continually switching itself on and off again according to pre-set times.
Step 7: Restart The AC Unit Section
Pull the AC Unit section’s power cord out of the outlet. Then, insert it back into the outlet. This will allow electricity to flow through the circuit board once again. If this doesn’t work for you, please contact customer service for a replacement unit. If this does work for you, please continue with step 8 below.
Step 7 may not be necessary as stated above if there is no burnt smell coming from your exhaust vent. In that case, proceed to Step 8 below. The burned electrical smell coming from an AC Unit is usually a sign that your compressor has stopped functioning or is malfunctioning.
When these issues occur, we recommend replacing them immediately as these units contain toxic parts and may cause health problems when exposed over an extended period of time to both you and your family members..
Step 8: Check For Leaks And Flush The Pipes Section
Dakin AC systems also have a small door on the front. The purpose of this door is to allow you to flush out the pipes that lead from the heater unit. This is done by removing it and putting it back in place after running water through the inside of it.
Note that you will need to remove any dirt or debris from around the door area so that they do not accidentally get flushed out with water. The purpose of this step is mainly maintenance, as clogs can reduce airflow and make rooms hotter than they should be.
Step 9: Clean Up The Unit Section
If you don’t want an extra mess, place some newspaper or paper towels on the floor first before starting. To clean the unit section, remove the plastic skirt that has collected dirt and debris over time. If you need a new one, they are available at most hardware stores for a nominal fee.
Next, disconnect all of the ducts that were connected in Step 3 by removing them from their slots and cleaning any buildup or dust around them as well. It’s always a good idea to replace any worn-out ducts too.
Step 10: Clean Up after yourself
As with any DIY project, it’s important to clean up as you go along. Make sure you discard the refrigerant and replace all seals. If anything was exposed, double-bag and dispose of it. Finally, reassemble your unit and be on your way!
It may seem like a lot of work, but considering that most repairs are at least this involved, having an understanding of how your system works will save you money and time in the long run.
FAQs
Where is the Daikin reset button?
Daikin included a reset button on the system’s rear to make it easy for you to use.
What is an AC reset by hand?
Switch off your air conditioner using the thermostat. Examine the breaker panel.
Your air conditioner’s breaker should be turned off.
Wait at least one minute before switching the breaker back on. Wait 30 minutes before turning your unit back on at the thermostat.
The AC reset button is where?
Image for Ten simple steps to reset your Daikin air conditioner start by looking for it around the machine’s exterior. Especially around the bottom edge close to the ground.
The reset button on an air conditioner is usually red and obvious, so it should be simple to find. If there isn’t a reset button visible on the exterior, it can be hidden behind the service panel inside the device.
Also read: Fix Daikin AC Not Working – An Ultimate Guide
Conclusion
Hope so the problem of How To Reset Your Daikin Air Conditioner In Ten Easy Steps might have been solved. Do let me know if these ten steps helped you in any way. I will be happy to help you in detail.
If you still do not get the problem resolved, then you should contact Daikin Support so that you could solve the problem without any problem.
