
How to Make Cold Foam for Coffee: A Step-by-Step Guide
In the dynamic realm of coffee culture, innovation knows no bounds. Among the latest trends to captivate coffee enthusiasts, cold foam stands out as a luxurious yet easy-to-master addition to your coffee repertoire.
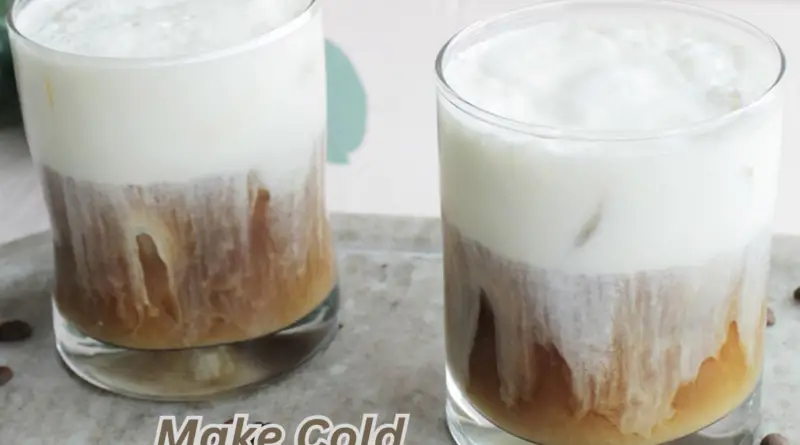
This velvety, airy topping can instantly elevate your everyday coffee into a cafe-quality delight. In this comprehensive guide, we will delve deep into the world of cold foam, sharing not only how to make it at home but also tips, tricks, and flavor variations to ignite your creativity.

Section 1: Understanding Cold Foam
What is Cold Foam?
Cold foam is a frothy, creamy topping that’s added to cold or hot coffee beverages. Unlike traditional whipped cream, which is made from heavy cream and sugar, cold foam is typically created by frothing cold milk or a milk alternative. This technique results in a light and airy texture, making it a versatile and delightful addition to your coffee creations.
Why Cold Foam?
Cold foam serves both an aesthetic and sensory purpose. It not only enhances the visual appeal of your coffee with its velvety layer but also adds a subtle creaminess to each sip, elevating the overall coffee experience. Whether you’re an iced coffee aficionado or prefer your brew piping hot, cold foam can be customized to suit your taste preferences.
Section 2: The Essentials – Ingredients and Equipment
Before we dive into the step-by-step process, let’s ensure you have everything you need to craft the perfect cold foam coffee.
Ingredients You’ll Need:
For the Coffee:
- Freshly brewed coffee (hot or cold)
- Sweetener (optional)
- Milk or milk alternative (for the coffee)
For the Cold Foam:
- Cold milk or milk alternative (dairy or non-dairy)
- Sweetener (optional)
- A mason jar or a milk frother
- Ice cubes (optional)
Section 3: Crafting the Perfect Cold Foam
Now, let’s explore the step-by-step process of creating cold foam for your coffee.
Step 1: Gather Your Ingredients
Begin by assembling all the necessary ingredients and equipment. Having everything ready will ensure a seamless coffee-making experience.
Step 2: Brew Your Coffee
Whether you’re a fan of hot or cold coffee, brew your coffee to your desired strength. If you prefer your coffee sweet, consider adding your sweetener of choice while it’s still hot to allow it to dissolve effectively.
Step 3: Choose Your Milk
For your cold foam, you have the flexibility to use dairy milk or any milk alternative like almond, soy, oat, or coconut milk, depending on your dietary preferences. The key is to use cold milk for the best results.
Step 4: Sweeten Your Cold Foam (Optional)
If you enjoy a hint of sweetness in your cold foam, you can add your preferred sweetener to the cold milk. Choices include sugar, honey, or even flavored syrups. Stir until the sweetener is fully dissolved.
Step 5: Prepare Your Mason Jar
Select a mason jar or any container with a tight-fitting lid. This container will act as your “shaker” for creating the creamy, frothy cold foam. Ensure it is clean and dry.
Step 6: Shake, Shake, Shake!
Pour your sweetened cold milk into the mason jar, filling it approximately one-third full. Seal the jar tightly, making sure there are no leaks, and then shake vigorously. The goal is to shake for about 30 seconds to a minute, or until the milk has doubled in volume, acquiring that dreamy, frothy consistency.
Step 7: Add Ice (Optional)
If you’re preparing an iced coffee, add ice cubes to your freshly brewed coffee. This step is optional but highly recommended as it imparts a refreshing chill to your coffee creation.
Step 8: Assemble Your Drink
Carefully pour your brewed coffee over the ice (if using), leaving some space at the top of your glass. Then, gently spoon or pour your cold foam over the coffee.
Step 9: Savor the Moment
Retrieve a straw, give your coffee a gentle stir if desired, and revel in the delightful experience of your homemade cold foam coffee. The combination of creamy foam and aromatic coffee is sure to tantalize your taste buds.
Section 4: Fine-Tuning Your Cold Foam Experience
Now that you’ve mastered the basics, let’s explore ways to take your cold foam coffee to the next level.
Flavor Variations
- Vanilla Cold Foam: Add a dash of vanilla extract or vanilla syrup to your cold foam for a sweet and aromatic twist.
- Caramel Cold Foam: Drizzle caramel sauce over your foam or mix it directly into your cold milk for a rich, caramel-flavored topping.
- Mocha Cold Foam: Combine cocoa powder with your sweetener of choice for a delightful chocolate-infused cold foam.
- Hazelnut Cold Foam: Infuse your cold milk with hazelnut flavor using hazelnut syrup or ground hazelnuts.
- Cinnamon Spice Cold Foam: Add ground cinnamon and a touch of nutmeg to your cold milk for a warm and cozy flavor profile.
Non-Coffee Options
Cold foam isn’t limited to coffee; you can explore its potential with other beverages:
- Iced Tea: Transform your iced tea into a luxurious treat by topping it with cold foam.
- Chai Latte: Elevate your chai latte by replacing traditional milk foam with cold foam.
- Herbal Cold Brew: Experiment with cold foam on herbal cold brews for a refreshing non-caffeinated option.
Also Read: How to Use a Keurig Coffee Maker: A Step-by-Step Guide
FAQ’s
Is cold foam just whipped cream?
Cold foam and whipped cream are similar in that they both involve incorporating air into a liquid to create a frothy, light texture. However, they are not exactly the same.
Cold foam is typically made by frothing cold milk using a milk frother or similar equipment. It creates a velvety, creamy texture that can be used as a topping for various beverages, such as coffee and cold drinks. Cold foam is often flavored or sweetened to complement the beverage it’s paired with. It’s commonly found in specialty coffee shops and is used to enhance the overall experience of the drink.
Whipped cream, on the other hand, is made by whipping heavy cream until it thickens and forms soft peaks. It’s usually sweetened with sugar and sometimes flavored with vanilla. Whipped cream is a versatile topping that can be used on desserts, cakes, pies, hot beverages, and more.
While both cold foam and whipped cream involve aeration to create texture, they differ in terms of the base ingredient used (cold milk for cold foam and heavy cream for whipped cream) and their typical applications.
How do baristas make foam?
Baristas create foam for beverages like lattes and cappuccinos using a milk frothing technique. They use a milk frothing pitcher and the steam wand of an espresso machine. Here’s a condensed overview:
- Milk Choice: Baristas select milk type based on desired foam quality.
- Pitcher: They choose a suitable stainless-steel frothing pitcher.
- Steam Wand Prep: Clean and purge the steam wand.
- Positioning: Submerge the steam wand tip just below the milk surface at an angle.
- Frothing: Activate the steam wand to introduce air into the milk, creating foam.
- Texture Control: Adjust steam pressure and wand position for texture.
- Observation: Listen for a hissing sound, and watch for microfoam.
- Temperature Check: Use a thermometer to monitor milk temperature (150-160°F).
- Adjustment: Modify wand depth as milk expands.
- Pouring: Pour milk into espresso, layering foam on top.
Baristas aim for consistent, quality foam that enhances beverages’ flavor and appearance. Mastery requires practice and skill.
What is the best milk for cold foam?
The choice of milk for cold foam depends on personal preference and dietary considerations. Various milk types can be used to create a creamy and frothy cold foam. Common options include dairy milk, non-dairy alternatives like almond, soy, oat, and coconut milk, as well as specialty barista blends.
- Dairy Milk: Whole milk contains more fat, which contributes to a richer and creamier texture. However, low-fat or skim milk can also create satisfactory cold foam with less fat content.
- Almond Milk: Almond milk can create a nutty and mildly sweet foam. Opt for unsweetened versions to control sweetness.
- Soy Milk: Soy milk creates a foam similar to dairy milk, offering a neutral taste that works well with various flavors.
- Oat Milk: Oat milk produces a naturally sweet and creamy foam, making it a popular choice among non-dairy alternatives.
- Coconut Milk: Coconut milk adds a unique tropical flavor to the foam, suitable for drinks with complementary flavor profiles.
- Barista Blends: Some brands offer special barista versions of non-dairy milk, formulated to froth well and create stable foam.
Factors like protein content, fat content, and additives can affect foam quality. It’s advisable to experiment with different milk types to determine which creates the desired taste and texture for your cold foam.
How to make cold foam for coffee with a milk frother?
To make cold foam for coffee using a milk frother, follow these steps:
- Gather Your Ingredients and Equipment:
- Cold milk of your choice (dairy or non-dairy)
- Coffee
- Sweetener or flavorings (if desired)
- Milk frother
- Tall glass or cup
- Chill the Milk:
- Ensure the milk is cold, as this helps create a better foam. You can chill it in the refrigerator before using it.
- Add Flavors (Optional):
- If you want flavored cold foam, add any desired sweeteners or flavorings (such as vanilla syrup or flavored syrups) to the cold milk. Stir gently to mix.
- Froth the Milk:
- Insert the frothing attachment into the milk frother.
- Pour the cold milk into the frothing pitcher up to the recommended level.
- Place the pitcher under the frother and start the frothing process according to your frother’s instructions. Typically, press the button to froth the milk.
- Froth Until Creamy:
- Keep the frother running until the milk is frothy and has expanded in volume. The froth should have a creamy and velvety texture.
- Pour the Foam:
- Brew your coffee and pour it into a glass or cup, leaving space at the top for the foam.
- Hold back the milk froth with a spoon to pour the liquid milk into the coffee, then use a spoon to scoop the foam on top.
- Enjoy:
- Your coffee with cold foam is ready to enjoy! The foam adds a creamy and frothy layer to your coffee.
Remember that different milk types and frothers may require slight adjustments in the frothing process. Practice and experimentation will help you achieve the desired cold foam consistency and flavor.
Also Read: How To Use Cuisinart Coffee Maker? A Step By Step Guide
Conclusion
With this comprehensive guide, you’ve unlocked the secrets to crafting impeccable cold foam for coffee. Whether you’re a coffee connoisseur seeking to replicate your favorite coffee shop’s creations or simply looking to add a touch of luxury to your daily brew, cold foam has you covered.
The possibilities are endless, from flavor variations to its application in various beverages. Explore, experiment, and savor the journey of mastering the art of cold foam for coffee. Cheers to indulgent coffee moments!
