
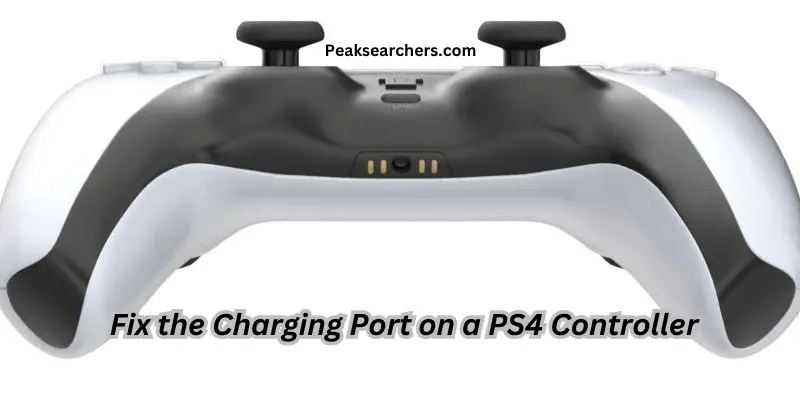
How to Fix the Charging Port on a PS4 Controller? A Comprehensive Guide
Welcome to our comprehensive guide on fixing the charging port issue of your PS4 controller. If you’re experiencing difficulties charging your controller, you’ve come to the right place. In this article, we will walk you through the steps to troubleshoot and repair the charging port on your PS4 controller, ensuring that you can get back to gaming in no time. Let’s dive right in!
Tools and Materials You’ll Need
Before we begin, gather the following tools and materials to ensure a smooth repair process:
- Small Phillips head screwdriver
- Flathead screwdriver or plastic pry tool
- Isopropyl alcohol and cotton swabs
- Replacement charging port
- Soldering iron and solder (if necessary)
- Tweezers
- Heat gun or hairdryer (optional)
Understanding the Charging Port
The charging port on a PS4 controller is a vital component that allows you to recharge the controller’s internal battery. Over time, the port may become damaged due to wear and tear, improper handling, or accidents. Common issues include loose connections, bent pins, or complete failure of the charging port.
Troubleshooting Before Repair
Before proceeding with the repair, it’s important to rule out any potential issues that may not require a complete replacement. Here are a few troubleshooting steps you can take:
- Try using a different USB cable and power source to ensure the problem is not related to faulty cables or power outlets.
- Clean the charging port with compressed air to remove any dust or debris that may be obstructing the connection.
- Reset the controller by pressing the reset button located on the back of the controller using a small pin or paper clip.
If these troubleshooting steps do not resolve the issue, it’s likely that the charging port itself needs to be replaced.
Sourcing a Replacement Charging Port
When purchasing a replacement charging port for your PS4 controller, it’s essential to choose a high-quality, genuine part. You can find replacement charging ports online through reputable electronics suppliers or gaming accessory stores. Ensure that the replacement charging port is compatible with your specific PS4 controller model to avoid any compatibility issues.
Step 1: Prepare Your Workspace
To start, find a clean, well-lit area where you can work comfortably. It’s essential to have enough space to lay out the components and tools you’ll be using. This will prevent any small parts from getting lost and make the repair process more efficient.
Step 2: Disassemble the PS4 Controller
To access the charging port, you’ll need to disassemble the PS4 controller carefully. Follow these steps:
- Use the small Phillips head screwdriver to remove the screws located on the back of the controller.
- Gently separate the front and back covers of the controller, being mindful of any ribbon cables or connectors that may be attached.
- Carefully disconnect any ribbon cables or connectors by gently lifting the retaining tabs and sliding them out.
Step 3: Remove the Faulty Charging Port
Now that you have the controller disassembled, you can proceed to remove the faulty charging port. Follow these steps:
- Locate the charging port on the circuit board. It will be connected to the mainboard via small soldered joints.
- Use the soldering iron to heat the solder joints while gently applying pressure with the flathead screwdriver or plastic pry tool to lift the charging port.
- Once the solder joints are sufficiently heated, remove the charging port by carefully lifting it with the tweezers. Be cautious not to damage any surrounding components.
Step 4: Clean the Circuit Board
Before installing the new charging port, it’s crucial to clean the circuit board to ensure a good connection. Follow these steps:
- Dampen a cotton swab with isopropyl alcohol.
- Gently rub the cotton swab along the solder pads where the charging port was previously connected. This will remove any residual solder or debris.
- Allow the circuit board to air dry for a few minutes or use a heat gun or hairdryer on low heat to expedite the drying process.
Step 5: Install the Replacement Charging Port
Now that the circuit board is clean, it’s time to install the new charging port. Follow these steps:
- Take the replacement charging port and align it with the solder pads on the circuit board.
- Carefully solder each pin of the charging port to its corresponding solder pad. Ensure that you apply just enough solder to create a secure connection without causing any bridging between adjacent pins.
- Allow the soldered joints to cool and solidify before proceeding.
Step 6: Reassemble the PS4 Controller
With the new charging port securely in place, you can now reassemble the PS4 controller. Follow these steps:
- Reconnect any ribbon cables or connectors that were detached earlier by gently sliding them back into their respective slots and securing the retaining tabs.
- Align the front and back covers of the controller, ensuring that all screw holes are properly matched.
- Insert and tighten the screws on the back of the controller using the small Phillips head screwdriver.
Step 7: Test the Charging Port
Congratulations! You’ve successfully replaced the charging port on your PS4 controller. To ensure everything is working correctly, follow these steps to test the charging port:
- Connect the controller to a known working USB cable and plug it into a power source.
- Look for the charging indicator light on the controller. It should turn on, indicating that the charging port is functioning properly.
- Allow the controller to charge for a sufficient amount of time before disconnecting it.
Safety Precautions
Repairing electronic devices requires careful handling and attention to safety. Here are a few safety precautions to keep in mind:
- Disconnect the PS4 controller from any power source before starting the repair process.
- Use proper tools, such as a small Phillips head screwdriver and tweezers, to prevent damage to the controller and yourself.
- Avoid applying excessive force when disassembling or reassembling the controller to prevent accidental breakage or component damage.
- Take regular breaks during the repair process to avoid hand strain or fatigue.
Seeking Professional Assistance
If you are uncomfortable or inexperienced with electronics repair, it’s always recommended to seek professional assistance. Professional technicians have the expertise and tools necessary to perform the repair accurately and safely. Additionally, they may offer warranties or guarantees on their work, providing added peace of mind.
Remember, repairing the charging port on your PS4 controller may void any existing warranty. Consider the age of your controller and the cost of repair versus purchasing a new one before proceeding.
By following the steps outlined in this guide and exercising caution, you can successfully fix the charging port on your PS4 controller, ensuring that you can continue gaming without interruptions.
Also Read: How to Fix Stick Drift on PS4 Without Opening? A Comprehensive Guide
FAQ’s
How do I charge my PS4 controller if my USB port is broken?
If your PS4 controller’s USB port is broken, here are alternative ways to charge it:
- Charging Dock: Use a charging dock designed for PS4 controllers.
- External Charger: Get an external charger to charge the controller’s battery separately.
- Different Controller: Connect the broken controller to a working one using a USB cable.
- Wall Charger: Charge the removable battery using a USB wall charger.
These methods can help you charge your PS4 controller without relying on the broken USB port.
How do I clean my controller charging port?
- Power Off: Ensure that your controller is turned off and disconnected from any power source before starting the cleaning process.
- Inspect the Port: Take a close look at the charging port to check for any visible dirt, debris, or dust buildup. Use a flashlight if needed to get a clearer view.
- Compressed Air: Utilize a can of compressed air to blow into the charging port. Hold the can upright and direct short bursts of air into the port. This will help dislodge any loose particles or debris that may be obstructing the connection.
- Cotton Swab: Take a clean, dry cotton swab and gently insert it into the charging port. Gently swirl the cotton swab around the port to collect any remaining dirt or debris. Be careful not to apply excessive force or push the debris further into the port.
- Isopropyl Alcohol: Moisten another cotton swab with a small amount of isopropyl alcohol. Gently rub the moistened cotton swab inside the charging port to remove any stubborn residue or grime. This helps ensure a clean connection.
- Dry Thoroughly: Allow the charging port to air dries completely before attempting to charge your controller again. Ensure that there is no moisture remaining in the port, as it could cause damage or short circuits.
How do I fix my PS4 controller charging but not connecting?
If your PS4 controller is charging but not connecting, try these steps:
- Reset: Press and hold the reset button on the back of the controller.
- Different USB Cable: Use a different USB cable to connect the controller.
- Connect via USB: Connect the controller directly to the console or device using a USB cable.
- Update Firmware: Check for firmware updates for the controller and update if necessary.
- Repair: Pair the controller again by connecting it via USB and following the on-screen instructions.
- Check for Interference: Ensure there are no wireless interference sources nearby.
If the issue persists, consider contacting support for further assistance or repair.
PS4 Controller Charging Port Replacement?
- Prepare Workspace: Find a clean, well-lit area to work in. Prepare a soft cloth or mat to place your controller on to prevent any scratches or damage.
- Disassemble the PS4 Controller: Use the small Phillips head screwdriver to remove the screws on the back of the controller. Carefully detach the back cover from the front of the controller. Keep the screws in a safe place.
- Remove the Faulty Charging Port: Locate the charging port on the circuit board. Gently disconnect any connectors or cables attached to the charging port. Use tweezers or a small prying tool to carefully lift and remove the faulty charging port from the circuit board. Take note of how it is positioned for easier installation of the replacement.
- Clean the Circuit Board: Inspect the circuit board for any dirt or debris. Use a clean, dry cloth or compressed air to remove any particles that may affect the connection of the new charging port. Ensure the circuit board is clean and ready for replacement.
- Install the Replacement Charging Port: Take the new charging port and align it with the correct connectors on the circuit board. Gently press it into place, ensuring it is securely attached. Be cautious not to apply excessive force to avoid damaging the port or circuit board.
- Reassemble the PS4 Controller: Carefully reattach the back cover to the front of the controller. Align the screw holes and use the small Phillips head screwdriver to tighten the screws, ensuring they are snug but not overtightened.
- Test the Charging Port: Connect the controller to a known working USB cable and plug it into a power source. Look for the charging indicator light on the controller. It should turn on, indicating that the charging port is functioning properly. Allow the controller to charge for a sufficient amount of time before disconnecting it.
Also Read: How To Fix Sticky Buttons On PS4 Controller? A Step by Step Guide
Conclusion
In this guide, we have provided you with detailed instructions on how to fix the charging port on your PS4 controller. By following these steps carefully, you can regain the ability to charge your controller and enjoy uninterrupted gaming sessions. Remember to gather the necessary tools and exercise caution throughout the repair process. Happy gaming!
