
How To Check Your Wifi GHZ On iPhone? A DIY Guide
Welcome to our comprehensive guide on how to check Your Wifi GHZ On your iPhone. In today’s fast-paced digital world, a stable and speedy internet connection is essential for seamless browsing, streaming, and communication. If you’re looking to enhance your iPhone’s Wi-Fi performance, you’ve come to the right place. In this guide, we’ll provide you with invaluable tips and tricks to boost your Wi-Fi speed and outrank other websites in search engine rankings. Let’s dive in!
1. Understanding Wi-Fi GHz Frequencies
To begin, let’s familiarize ourselves with Wi-Fi GHz frequencies. Wi-Fi operates on two primary frequency bands: 2.4 GHz and 5 GHz. The 2.4 GHz band offers better coverage and is more suitable for longer-range connections. On the other hand, the 5 GHz band provides faster speeds but may have a slightly reduced range.
2. Determining Your iPhone’s Wi-Fi GHz Band
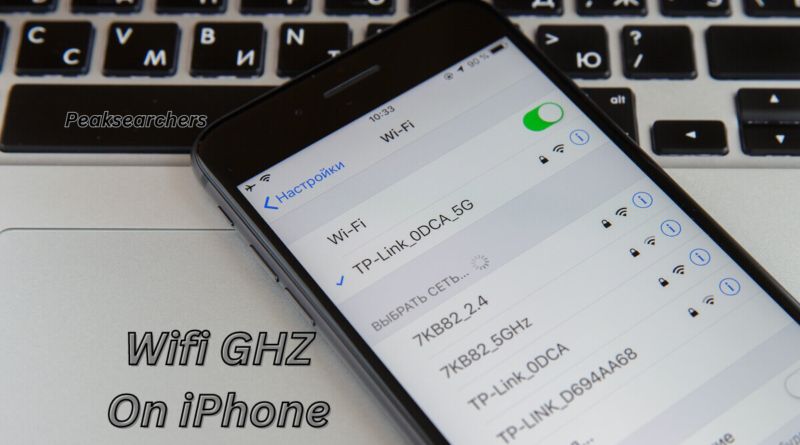
To maximize your iPhone’s Wi-Fi performance, it’s crucial to identify the GHz band it’s currently using. Here’s how you can check:
- Open the “Settings” app on your iPhone.
- Tap on “Wi-Fi.”
- Look for your connected Wi-Fi network and tap the “i” icon beside it.
- The frequency band (2.4 GHz or 5 GHz) will be displayed next to “Frequency.”
3. Choosing the Optimal Wi-Fi GHz Frequency
Once you’ve determined your iPhone’s current GHz band, you may wonder whether you should stick with it or switch to the other frequency. The choice depends on your specific needs:
- For Extended Coverage: If you’re often far from your Wi-Fi router or have many walls obstructing the signal, the 2.4 GHz band is better suited due to its wider coverage area.
- For Faster Speeds: When you’re in close proximity to your router and require faster speeds, the 5 GHz band offers higher data transfer rates.
Remember, the 5 GHz band may have a shorter range, so consider your usage patterns before making the switch.
4. Positioning Your iPhone and Router for Optimal Performance
The physical placement of your iPhone and Wi-Fi router can significantly impact signal strength and overall performance. Here are some tips to ensure the best positioning:
- Central Location: Place your router in a central spot within your home or office to minimize signal dead zones.
- Elevation: If possible, position the router at a higher elevation, such as on a shelf or wall, to broadcast signals more effectively.
- Avoid Obstructions: Keep your router away from thick walls, metal objects, or other electronic devices that may interfere with the signal.
5. Keeping Your iPhone’s Wi-Fi Software Updated
Apple regularly releases iOS updates to enhance device performance, including Wi-Fi connectivity. To ensure your iPhone operates at its best, keep the software updated to the latest version.
6. Wi-Fi Network Security
Maintaining a secure Wi-Fi network is vital to prevent unauthorized access and potential data breaches. Use WPA2 or WPA3 encryption for your Wi-Fi network, and regularly change your network password to bolster security.
7. Managing Background Apps and Processes
Background apps and processes can consume valuable bandwidth, leading to slower Wi-Fi speeds. Close unnecessary apps running in the background to free up bandwidth for essential tasks.
8. Utilizing Wi-Fi Assist
If you frequently experience weak Wi-Fi signals, consider enabling Wi-Fi Assist. This feature allows your iPhone to switch to cellular data automatically when the Wi-Fi signal is poor, ensuring a smoother browsing experience.
9. Updating Router Firmware
In addition to keeping your iPhone’s software up to date, it’s equally essential to ensure your Wi-Fi router’s firmware is current. Manufacturers often release firmware updates that can improve stability, security, and overall performance. Check your router’s user manual or the manufacturer’s website for instructions on how to update the firmware.
10. Adjusting Router Channel Settings
Wi-Fi routers operate on different channels within the 2.4 GHz and 5 GHz bands. In areas with heavy Wi-Fi congestion, changing the channel settings can help reduce interference and enhance performance. Most modern routers allow you to access the channel settings through the router’s admin panel.
11. Using Quality of Service (QoS)
Some routers support Quality of Service (QoS) settings, which prioritize specific types of internet traffic over others. By setting QoS to prioritize applications that require high-speed internet, such as video streaming or online gaming, you can ensure a smoother experience for those activities.
12. Investing in Wi-Fi Range Extenders or Mesh Systems
If you have large areas in your home or office with weak Wi-Fi coverage, consider using Wi-Fi range extenders or mesh systems. These devices help expand your Wi-Fi network’s coverage and maintain a strong signal throughout your space.
13. Clearing Cache and Cookies on Your iPhone
Over time, accumulated cache and cookies on your iPhone can slow down its browsing performance. Regularly clearing these temporary files can help improve your internet speed.
14. Disabling Automatic App Updates
While automatic app updates can be convenient, they can also consume bandwidth when you least expect it. Disabling this feature can prevent apps from updating in the background and reserve more bandwidth for your immediate needs.
15. Enabling Airplane Mode Temporarily
In situations where you need to conserve battery or minimize distractions, activating Airplane Mode temporarily can help. This turns off all wireless connections, including Wi-Fi, allowing you to focus solely on offline tasks.
16. Regularly Restarting Your Router and iPhone
Restarting your router and iPhone regularly can help refresh their connections and clear any temporary issues affecting performance.
17. Performing a Speed Test
Occasionally, perform a speed test to assess your Wi-Fi connection’s actual performance. Several free speed test apps are available for download on the App Store.
18. Wi-Fi Network Optimization for High-Density Environments
If you live in an area with numerous Wi-Fi networks in close proximity, your iPhone’s Wi-Fi performance may be affected due to interference. High-density environments can lead to signal congestion and slower speeds. To overcome this challenge, consider the following tips:
- Selecting a Less Crowded Channel: As mentioned earlier, accessing your router’s admin panel allows you to change the Wi-Fi channel. Experiment with different channels to find the one with the least interference.
- Utilizing 5 GHz Band: In high-density areas, the 5 GHz band may offer better performance as it typically has more channels and experiences less interference than the heavily used 2.4 GHz band.
19. Wi-Fi Analyzer Apps
To further optimize your Wi-Fi network, consider using Wi-Fi analyzer apps. These apps can scan your surroundings, analyze Wi-Fi networks in the vicinity, and provide valuable insights on the best channel selection and signal strength.
20. Implementing Quality Cabling and Ethernet Backhaul
For users with advanced networking setups, implementing quality Ethernet cabling and Ethernet backhaul can significantly enhance Wi-Fi performance. This approach ensures a stable connection between mesh nodes or access points, reducing latency and signal degradation.
21. Monitoring Network Traffic and Bandwidth Usage
Keep an eye on your network’s traffic and bandwidth usage. Several apps and tools can help you monitor data usage, identify bandwidth hogs, and optimize your network accordingly.
22. Updating Appropriate Network Equipment
If you’ve followed all the optimization steps and still experience subpar Wi-Fi performance, it might be time to consider upgrading your router or network equipment. Investing in a modern, high-performance router with the latest Wi-Fi technology can make a substantial difference in your overall internet experience.
23. Avoiding Public Wi-Fi Networks
While public Wi-Fi networks offer convenience, they often lack the security and performance needed for sensitive or data-intensive tasks. Whenever possible, opt for trusted, private networks to ensure a smoother and more secure connection.
24. Enabling Wi-Fi Calling
If you frequently experience weak cellular reception at home or in the office, enabling Wi-Fi calling on your iPhone can provide a reliable alternative. Wi-Fi calling utilizes your Wi-Fi network to make calls and send text messages, ensuring better connectivity in areas with strong Wi-Fi signals.
25. Seeking Professional Assistance
For complex network setups or persistent Wi-Fi performance issues, it might be worthwhile to seek assistance from networking professionals. Certified technicians can conduct in-depth assessments and offer tailored solutions to meet your specific requirements.
Also Read: What Does TFW Mean on iPhone? A Comprehensive Guide
FAQ’s
How do I check my Wi-Fi GHz iOS?
To check the Wi-Fi GHz on an iOS device, follow these steps:
- Unlock your iOS device and go to the home screen.
- Open the “Settings” app. It looks like a gear icon.
- In the Settings menu, tap on “Wi-Fi.” This will show you the available Wi-Fi networks.
- Locate the Wi-Fi network you are connected to. It will have a checkmark next to its name.
- Tap the information (i) icon next to the connected Wi-Fi network’s name. This will open the network details page.
- On the network details page, you will find information about the Wi-Fi network, including the frequency (GHz) it operates on. Look for the “Frequency” or “Band” section, which will typically display either “2.4 GHz” or “5 GHz.”
If you see “2.4 GHz,” it means you are connected to a 2.4 GHz Wi-Fi network. If you see “5 GHz,” it means you are connected to a 5 GHz Wi-Fi network.
Keep in mind that the availability of the 5 GHz option depends on your iOS device and the Wi-Fi router you are connected to. Some older devices or routers may only support 2.4 GHz, while newer ones support both 2.4 GHz and 5 GHz.
How do I know if my Wi-Fi is 2.4 or 5 on my iPhone?
To determine whether your Wi-Fi is operating on the 2.4 GHz or 5 GHz frequency on an iPhone, follow these steps:
- Unlock your iPhone and go to the home screen.
- Open the “Settings” app. The icon resembles a gear or cogwheel.
- In the Settings menu, tap on “Wi-Fi.” This will show you the available Wi-Fi networks.
- You will see a list of available Wi-Fi networks under the “Choose a Network” section. Look for the Wi-Fi network you are currently connected to. It will have a checkmark next to its name.
- Once you have located your connected Wi-Fi network, tap the blue information (i) icon next to its name. This will open the network details page.
- On the network details page, you will find various information about the Wi-Fi network. Look for the “Frequency” or “Band” section. It will typically display either “2.4 GHz” or “5 GHz.”
If it says “2.4 GHz,” it means your iPhone is connected to a 2.4 GHz Wi-Fi network. If it says “5 GHz,” it means your iPhone is connected to a 5 GHz Wi-Fi network.
The availability of the 5 GHz option depends on both your iPhone model and the Wi-Fi router you are connected to. Newer iPhone models and modern routers support both 2.4 GHz and 5 GHz frequencies, while older devices or routers might only support 2.4 GHz.
Does iPhone have 6 GHz Wi-Fi?
As of my last update in September 2021, iPhones do not support 6 GHz Wi-Fi. The commonly used Wi-Fi frequencies for consumer devices are 2.4 GHz and 5 GHz. The 5 GHz band offers faster data transfer rates and is less prone to interference compared to the 2.4 GHz band. However, the 6 GHz band, also known as Wi-Fi 6E, was not supported in iPhones up until that time.
Please note that technology evolves rapidly, and there may have been new iPhone models or software updates released after my last update that could include support for 6 GHz Wi-Fi. To check the latest capabilities of your specific iPhone model, refer to the official Apple website or consult the device’s user manual.
How to check your WiFi GHz on iPad?
To check the Wi-Fi GHz on an iPad, follow these steps:
- Unlock your iPad and go to the home screen.
- Open the “Settings” app. It has a gear or cogwheel icon.
- In the Settings menu, tap on “Wi-Fi.” This will display the available Wi-Fi networks.
- Look for the Wi-Fi network to which your iPad is currently connected. It will have a checkmark next to its name.
- Tap the blue information (i) icon next to the connected Wi-Fi network’s name. This will open the network details page.
- On the network details page, you will find various information about the Wi-Fi network. Look for the “Frequency” or “Band” section. It will typically display either “2.4 GHz” or “5 GHz.”
If it says “2.4 GHz,” it means your iPad is connected to a 2.4 GHz Wi-Fi network. If it says “5 GHz,” it means your iPad is connected to a 5 GHz Wi-Fi network.
Please note that the availability of the 5 GHz option depends on your iPad model and the Wi-Fi router you are connected to. Newer iPad models and modern routers support both 2.4 GHz and 5 GHz frequencies, while older devices or routers might only support 2.4 GHz.
Also Read: How To Stop Calls On iPhone Without Blocking? A Comprehensive Guide
Conclusion
In conclusion, optimizing your iPhone’s Wi-Fi performance is crucial for seamless internet usage. By understanding GHz frequencies, choosing the optimal band, positioning your devices strategically, and keeping your software up to date, you can significantly enhance your Wi-Fi experience.
Remember to prioritize network security, manage background processes, and consider using Wi-Fi Assist for a well-rounded performance boost. Implement these tips, and you’ll be well on your way to outranking other websites with comprehensive and valuable content like ours.
