
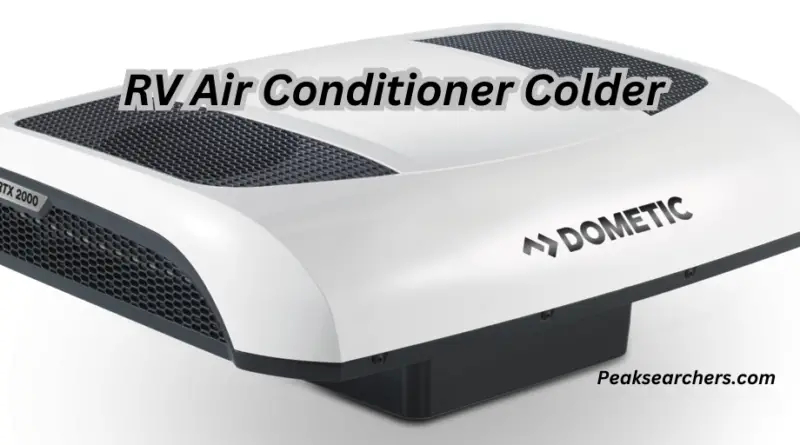
How Do I Make My RV Air Conditioner Colder? A Complete Solution
Summer is the perfect time for outdoor activities and camping trips with family and friends. But when it’s too hot outside, staying in an RV can be uncomfortable without a properly functioning air conditioner. And sometimes, even if your RV has an AC unit, it may not provide enough coolness to make you feel comfortable. If that’s the case for you, there are things you can do to make your RV air conditioner colder.
The first thing to check is your RV’s air filter. A dirty or clogged filter can reduce airflow and limit the AC unit’s ability to cool down the space effectively. Replace or clean it if necessary before moving on to other steps.
For the next steps, you will need to go down to read the article. Once I was outside with my family and my RV Air conditioner stopped cooling. I did not know how to get rid of the situation because I was not a professional at that time. I called my friend and he guided me. Here’s what I did.
Why you need a colder RV air conditioner
Firstly, it’s essential to understand why you need a colder RV air conditioner. During the summer months, the temperature inside an RV can become unbearable without proper ventilation and cooling.
A colder air conditioner will help maintain a comfortable indoor temperature and prevent heat exhaustion or dehydration during extended trips. In order to make your RV air conditioner colder, simply follow the steps mentioned below.
Step 1: Check the thermostat settings
This may sound obvious, but it is worth checking the thermostat settings before you do anything else. Make sure that the thermostat is set to cool and that the temperature setting is lower than the current temperature in your RV. The lower you set it, the colder your air conditioner will blow.
Once you have checked the thermostat settings, wait a few minutes for your air conditioner to adjust and start blowing cold air again. If it still isn’t blowing cold air, move on to step two.
It’s also important to note that if your RV has multiple air conditioning units, you’ll need to check each one individually as they may have different thermostats and settings. Take note of which unit cools which area of your RV so you can troubleshoot more effectively later on.
By taking just a minute or two to check your thermostat settings, you could save yourself time and money by avoiding unnecessary repairs or maintenance on your air conditioning unit.
Step 2: Inspect and clean the air filter
The second step in making your RV air conditioner colder is inspecting and cleaning the air filter. Over time, dirt and debris accumulate on the filter which can cause it to become clogged.
This reduces the airflow through the unit and ultimately decreases its cooling efficiency. To inspect the air filter, locate it within your RV’s unit and remove it from its housing. Hold it up to a light source and check for any visible blockages or debris build-up.
To clean the air filter, first shake off any loose debris or dust particles outside of your RV. Then, use a gentle brush or vacuum cleaner attachment to remove any remaining dirt from both sides of the filter.
If necessary, you can also soak the filter in warm soapy water for about 15 minutes before rinsing thoroughly with water. Allow the filter to dry completely before replacing it back into your RV’s unit.
By regularly inspecting and cleaning your RV’s air filters, you can ensure that your unit is functioning at peak performance levels while maintaining optimal indoor temperatures during hot summer months on road trips or camping adventures.
Step 3: Inspect and clean the condenser coils
When it comes to making your RV air conditioner colder, inspecting and cleaning the condenser coils is an essential step. The condenser coils are responsible for removing heat from the refrigerant, allowing it to cool down and produce cold air. However, over time, these coils can become covered in dirt, debris, and other contaminants that hinder their ability to function properly.
To clean the condenser coils on your RV air conditioner, you’ll need to first locate them. Depending on your unit’s design, they may be located on the outside or inside of the RV. Once you’ve found them, turn off the power supply to the air conditioner and remove any covers or panels that may be obstructing access to them.
Next, use a soft-bristled brush or a special coil cleaning tool to gently sweep away any dirt or debris from the surface of the coils. Be careful not to bend or damage them in any way. If there are stubborn stains or buildup on the coils that won’t come off with brushing alone, you can use a commercial coil cleaner designed specifically for this purpose.
After applying it according to manufacturer instructions and allowing it time to work its magic (usually around 10-15 minutes), rinse off thoroughly with water before reassembling everything back into place.
By taking care of your RV’s condenser coils regularly and keeping them clean from debris buildup will keep your AC unit running efficiently and effectively all summer long!
Step 4: Add insulation to your RV
Adding insulation to your RV is an effective way to keep the cool air inside and prevent it from escaping. Before you start any insulation work, make sure that all leaks in your RV are sealed properly. This will help you achieve maximum results and reduce the workload on your air conditioner.
The first step in adding insulation to your RV is to determine where exactly it’s needed. You can use a thermal imaging camera or an infrared thermometer to identify areas of heat transfer.
Common areas for insulation include windows, doors, vents, and walls. Once you’ve identified these areas, you can begin insulating them using materials such as fiberglass batts or spray foam.
Remember that not all types of insulation are suitable for every area of your RV. For example, spray foam may be more effective for sealing gaps around windows and doors while fiberglass batts are better suited for walls and ceilings.
Also, make sure that the insulation material meets safety standards and doesn’t pose any health risks to you or other occupants of the RV. By following these steps carefully, you can significantly improve the energy efficiency of your RV’s air conditioning system while making it colder than ever before!
Step 5: Consider upgrading your AC unit
Upgrading your RV air conditioning unit is a great option if you’ve tried all the other steps to make it colder and still aren’t satisfied.
Newer models are more energy-efficient and powerful than older versions, making them an excellent investment for your comfort while on the road. Be sure to research different models and brands before purchasing to ensure you get the best fit for your particular RV.
Additionally, upgrading your AC unit can also help with maintenance costs in the long run. Older units may require frequent repairs or part replacements, causing more expenses over time.
A newer model will likely have fewer issues and need less maintenance overall. Plus, with improved technology comes better air filtration systems, which can improve indoor air quality and reduce allergens in your RV.
While upgrading your AC unit may seem like a big expense upfront, consider the long-term benefits it can provide for both comfort and cost savings. Remember to consult with a professional before making any major changes to ensure proper installation and functionality of your new unit.
FAQ’s
Q: Why is my RV air conditioner not cooling enough?
A: There are several reasons why your RV air conditioner may not be cooling enough. The most common reason is a dirty or clogged air filter due to which this problem can happen. When the air filter is dirty, it restricts the airflow and reduces the cooling capacity of the AC unit. Another reason could be low refrigerant levels in your AC unit due to leakage or improper installation.
Q: How do I make my RV air conditioner colder?
A: To make your RV air conditioner colder, you need to ensure that all vents and windows are closed properly. Make sure that there are no obstructions blocking the airflow from both inside and outside of the RV. You can also try cleaning or replacing your AC unit’s air filter for better efficiency.
Q: Can I use an external fan to cool down my RV when on a camping trip?
A: Yes, you can use an external fan to cool down your RV when on a camping trip. An external fan will help circulate the cool air from your AC unit throughout your entire RV, making it more comfortable for everyone inside.
Also read: Fix Delonghi Portable Air Conditioner Not Evaporating Water
Conclusion
In conclusion, taking these steps to make your RV air conditioner colder will provide you with a more comfortable ride during hot summer days. The first step is to clean or replace the air filter, which can get clogged and significantly decrease the unit’s efficiency. Secondly, check if there are any leaks in the ductwork or unit itself as this can cause cold air to escape and reduce its effectiveness.
Another essential step is to ensure proper insulation of your RV. Poor insulation lets heat seep into your vehicle while preventing cool air from circulating effectively. You can add extra insulation around windows and doors or upgrade your AC unit with a higher BTU (British Thermal Units) rating to increase the cooling power.
Finally, always try parking in shady areas or installing awnings on your RV’s windows and doorways to minimize direct sunlight exposure. Follow these simple steps, and you’ll be able to enjoy a cooler, more comfortable ride inside your RV all summer long!
